
CUSTOMIZING A MILSPEC AR 15 TRIGGER
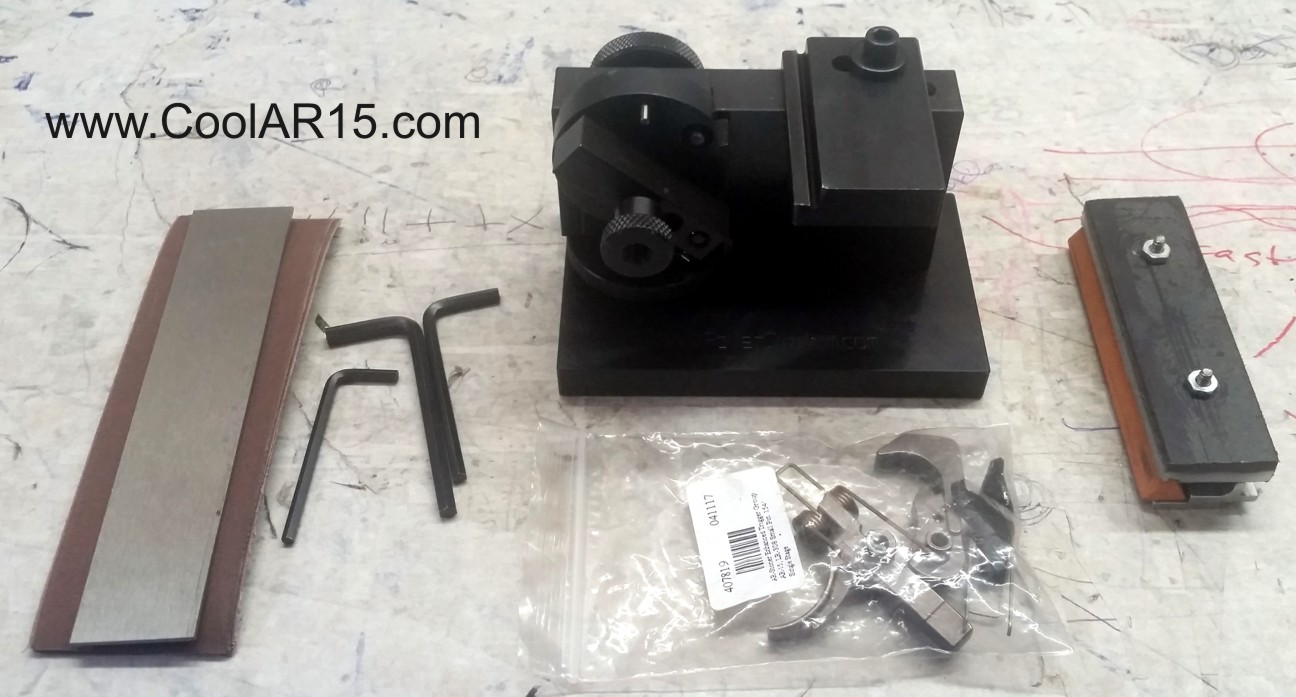
There are many ways to improve a milspec fire control system, covered on this page is my normal trigger job that takes very little time and except for tools costs very little. First make sure you have all your parts, picture number one shows an AR Stoner milspec trigger from Midway. This job can be done to any milspec trigger but whenever I find the AR Stoner kits on sale for $29 always add a few to my cart, at $59 regular price there are better options in that range such as ALG. You of course need the trigger, hammer and I use a Power Custom Hammer & Sear Jig with proper stoning fixture along with their stoning kit and Series 2 Stoning Fisture Triangle Stone Holder. Set the Stoning Fixture to hammer position and make sure hammer is installed square and the rest is in right position to hold tool of choice at proper angle. Sometimes on "super tweaked" or out of spec hammers work is required on disconector engagement areas but generally I don't get enough improvement out of messing with disconecctor fit to risk ruining a trigger group.

STONING THE HAMMER NOTCH
With hammer positioned and tool rest properly adjusted (may have to move both the rest and raise ore lower the holding fixture to ensure the stone will be working on proper area at proper angles) using the Triangle Stone Holder sitting on the guide to keep all surfaces square gently stone the hammer notch just till see any imperfections worked out and a nice square sharp engagement surface. As you start it will be easy to see the areas that are high as the stone starts to work on them. Be very careful to remove as little material as possible, this particular trigger has a proprietary plating to reduce friction and if can leave a thin layer at least in the low spots that take the least alteration. The second picture under this copy shows a nice clean hammer notch, you can click on any picture for larger view. as get more and better pictures will add and replace. This is all I do to the hammer in most circumstances.


WORKING FRONT PORTION OF SEAR
The first important part of working the sear is rotating the holding fixture from hammer position to sear position. Once in place make sure all parts are snug and once sear is installe that the tool guide and height is propery set to not alter the angle of the front of sear. With experience and some trashed parts can learn how to tweak angles to get more improvements out of your trigger. I use the metal flat supplied with the Stoning Kit and split my paper so it can be positioned to work the entire sear surface without unnesseary wear on the tool holding fixture. If click on the center picture will see how the paper is cut and not risking eventual uneven wear on fixture. According to my end goals and how bad out of square the sear is I generally stone with 240 grit paper. Sometimes If bad I start with a few strokes of 120 grit, then go to 240 grit. If really working a trigger slick for target or varmit work will take a few passes with 400 grit and if going all in final polish sear and hammer notch engagement surfaces with 800 grit wet/dry paper. You will easily watch the high spots get leveled out and stop removing metal soon as see entire surface leveling out.


WORKING TOP SURFACE OF SEAR
Now we jig the trigger to work the top portion of sear using same techiniques as front. It will require adjustment of height of holding fixture and adjustment of tool rest. First picture shows a nice level and square sear engagement surface with a nice mirror smooth finish. After prepping the trigger engagment surfaces we must prep the lower for a grub screw to adjust all the creep out of our milspec trigger. With surfaces square and polished, all creep removed and proper spring set we are going to end up with a stunning trigger. Next we will show how to a tirgger would pay close to a $100 for an equivalent custom unit. If want to know how we got here visit the milspec trigger customizaprep the lower for the grub screw.


guns in america, an explanation
for our european friends
NAVIGATION


ALL OF THE PHOTOS AND TEXT ON THIS SITE IS COPYRIGHTED. NO PORTION MAY BE REPRODUCED WITHOUT EXPRESSED WRITTEN CONSENT.
Join the N.R.A., Save Your Rights
